

Molding & Casting |
||||
| Introduction :: | ||||
Silicone molding is is simple process which involves a mixture of silicone which is poured, hardeened and creates a mould and that mould is used for casting later on.This part can be encapsulated with molding material and then many parts can be made from the resulting negative. This master can be encapsulated by supporting it on spacers and enclosing it in a retaining frame. Before starting the process of making a silicone rubber mold,we must first gather all the required tools, materials, and safety equipment. It is importance to have everything ready and handy, since the working life of polymers, i.e. the time they can flow, is not very long. application.
Molding or Mold making is the act of creating the cavity that carries a reverse impression of an original model. Molds can be made of a rigid material, such as plaster or plastic resin or more commonly, a flexible material such as rubber. The material to use should be chosen considering the material of the model.
|
||||
| This week's assignment was more challenging and difficult but many useful things were learnt along the way. The assignment is about making a mold and casting on it, so it seemed to be a clear workflow to follow. |
||||
| Moulding requirements | ||||
These are the following materials required for creating moulds for casting:- |
||||
| The Steps :: | ||||
STEP- 1 = Prepare a 3D model for the mold using platform and save it as stl file. |
||||
STEP- 2 = Export the stl file in and prepare the toolpath. |
||||
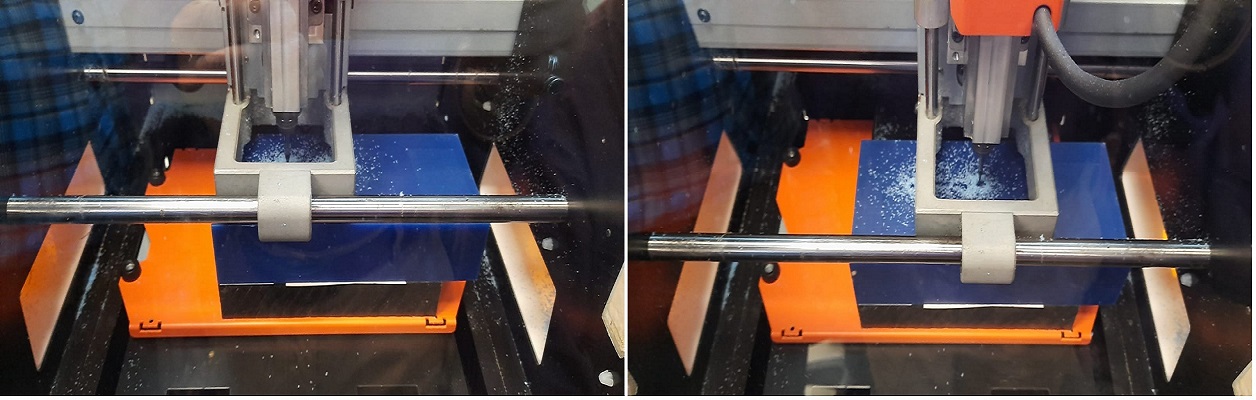
STEP- 3 = Mill it using Modella Wax on SRM 20 Milling machine Rough Cut & Finishing Cut |
||||
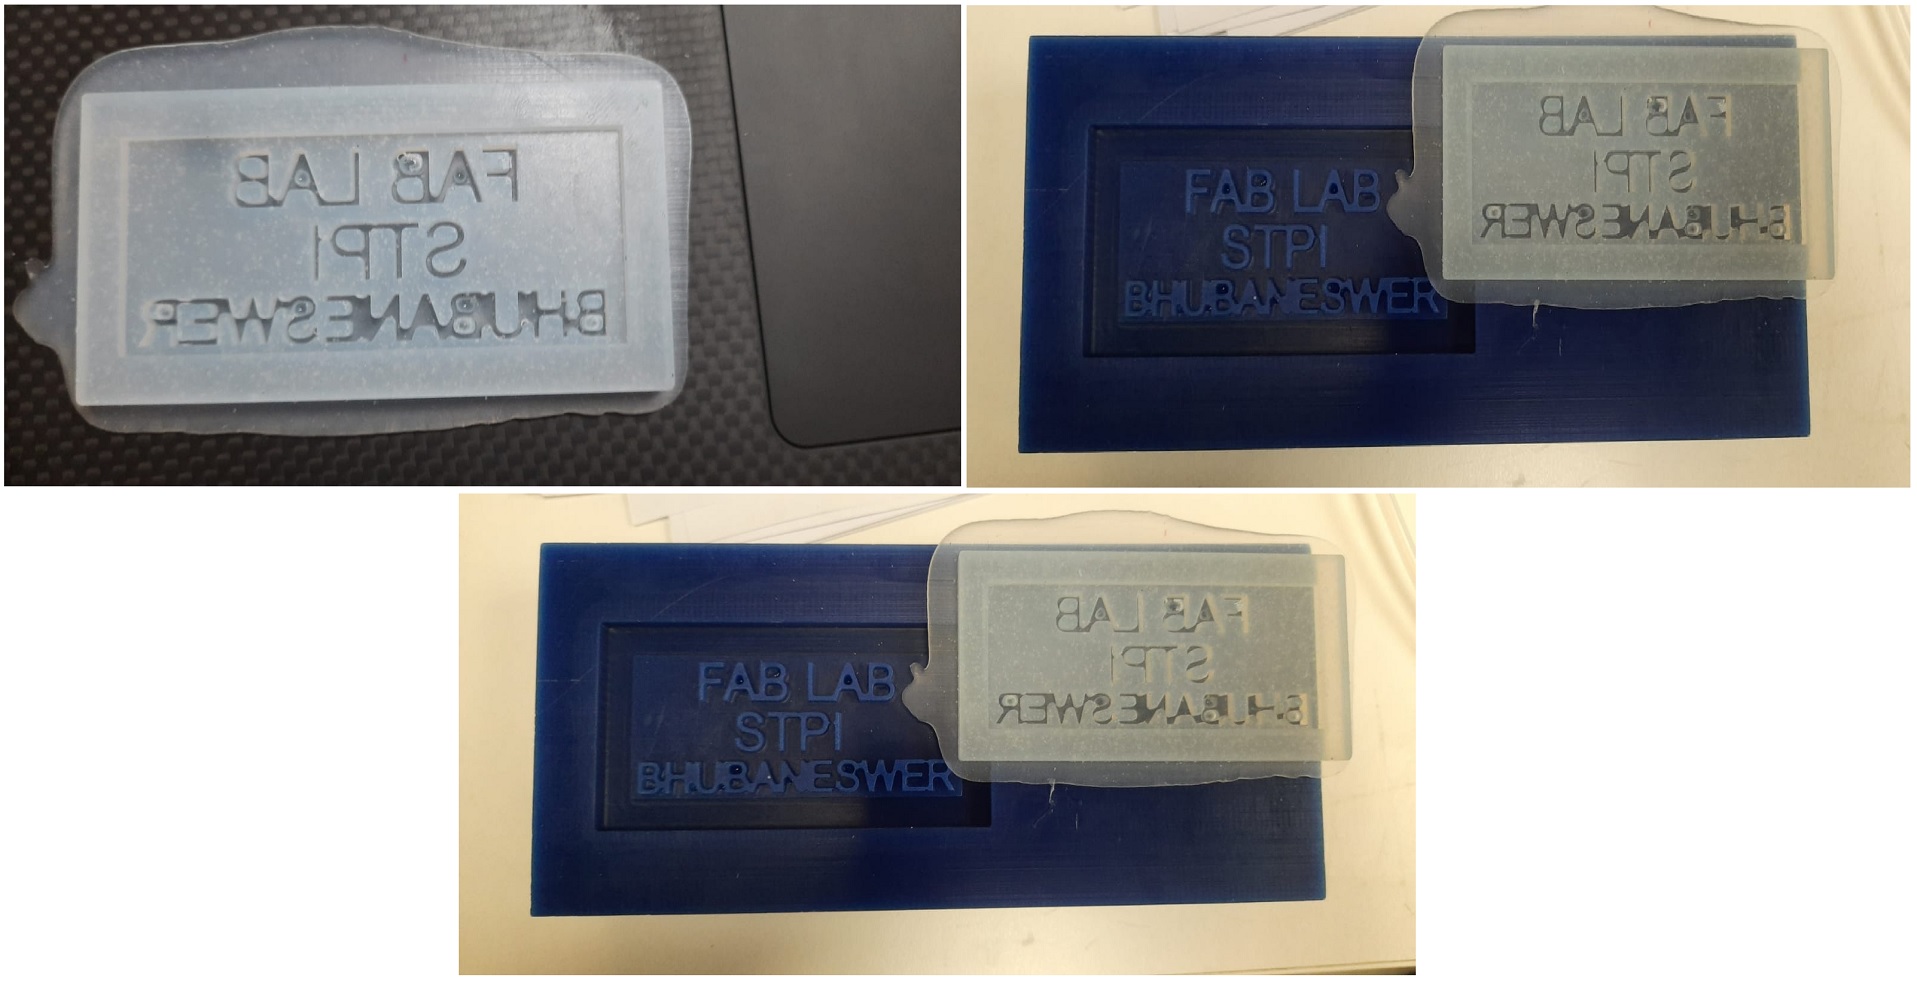
STEP- 4 = Create a Silicon Mold & Cast the final object |
||||
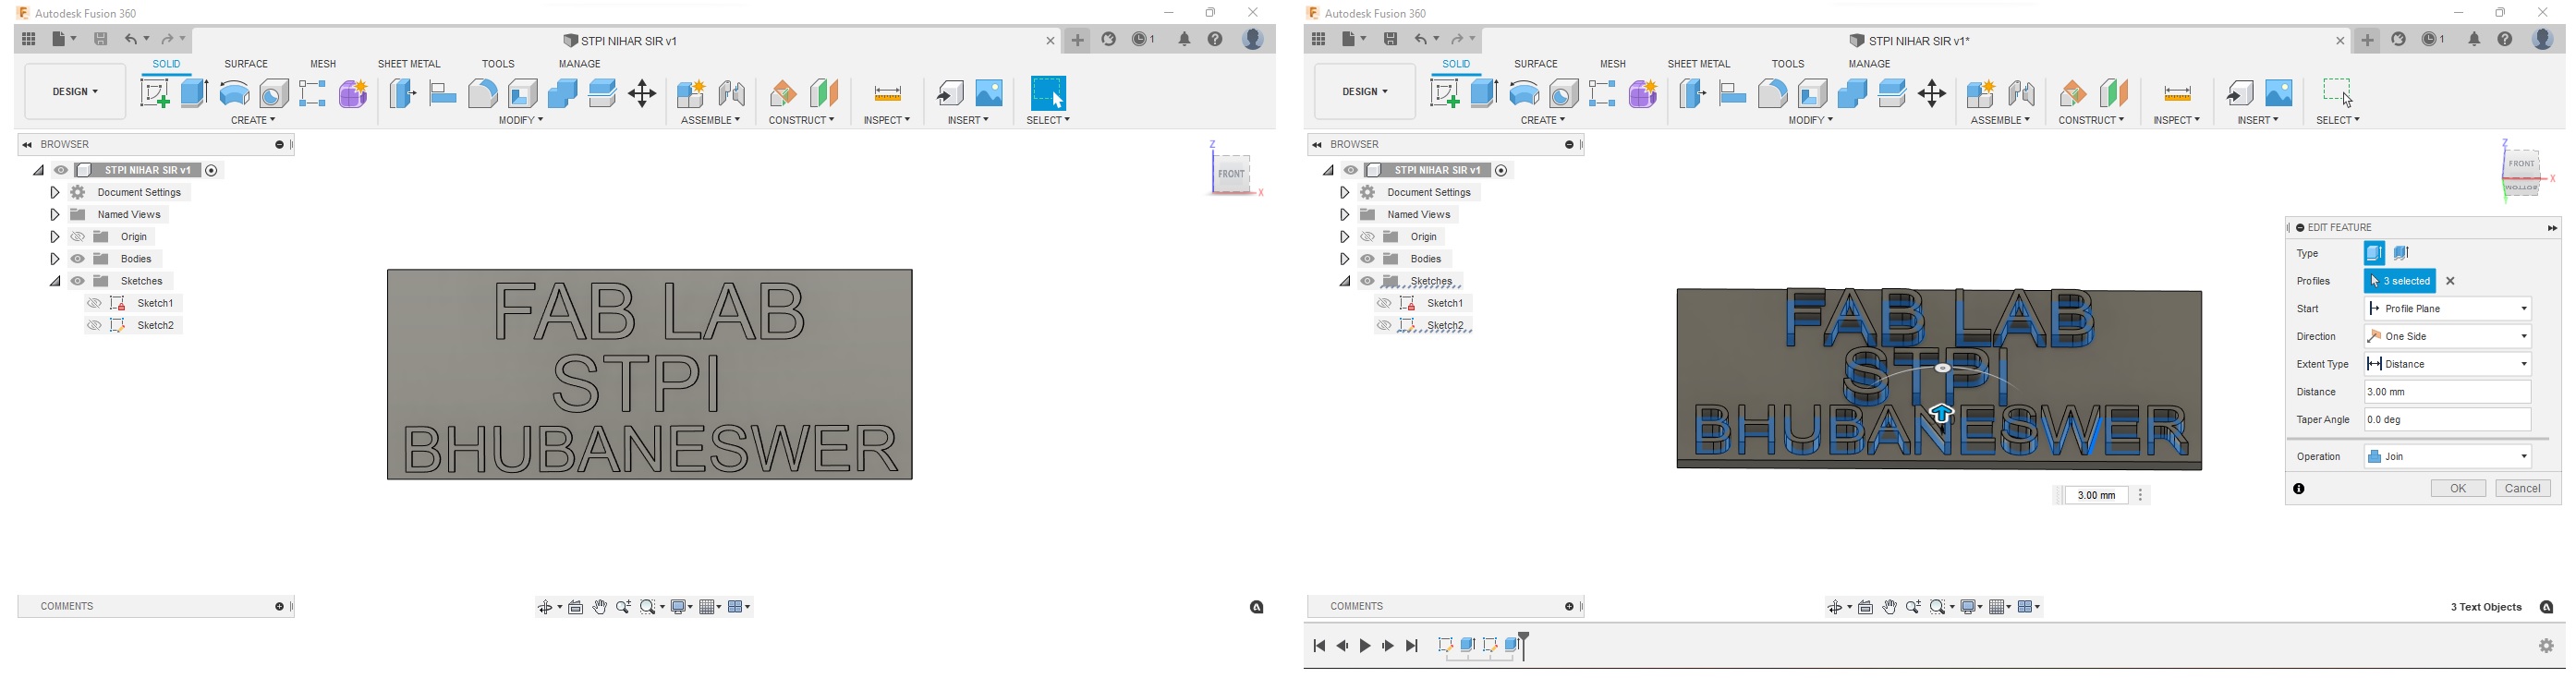
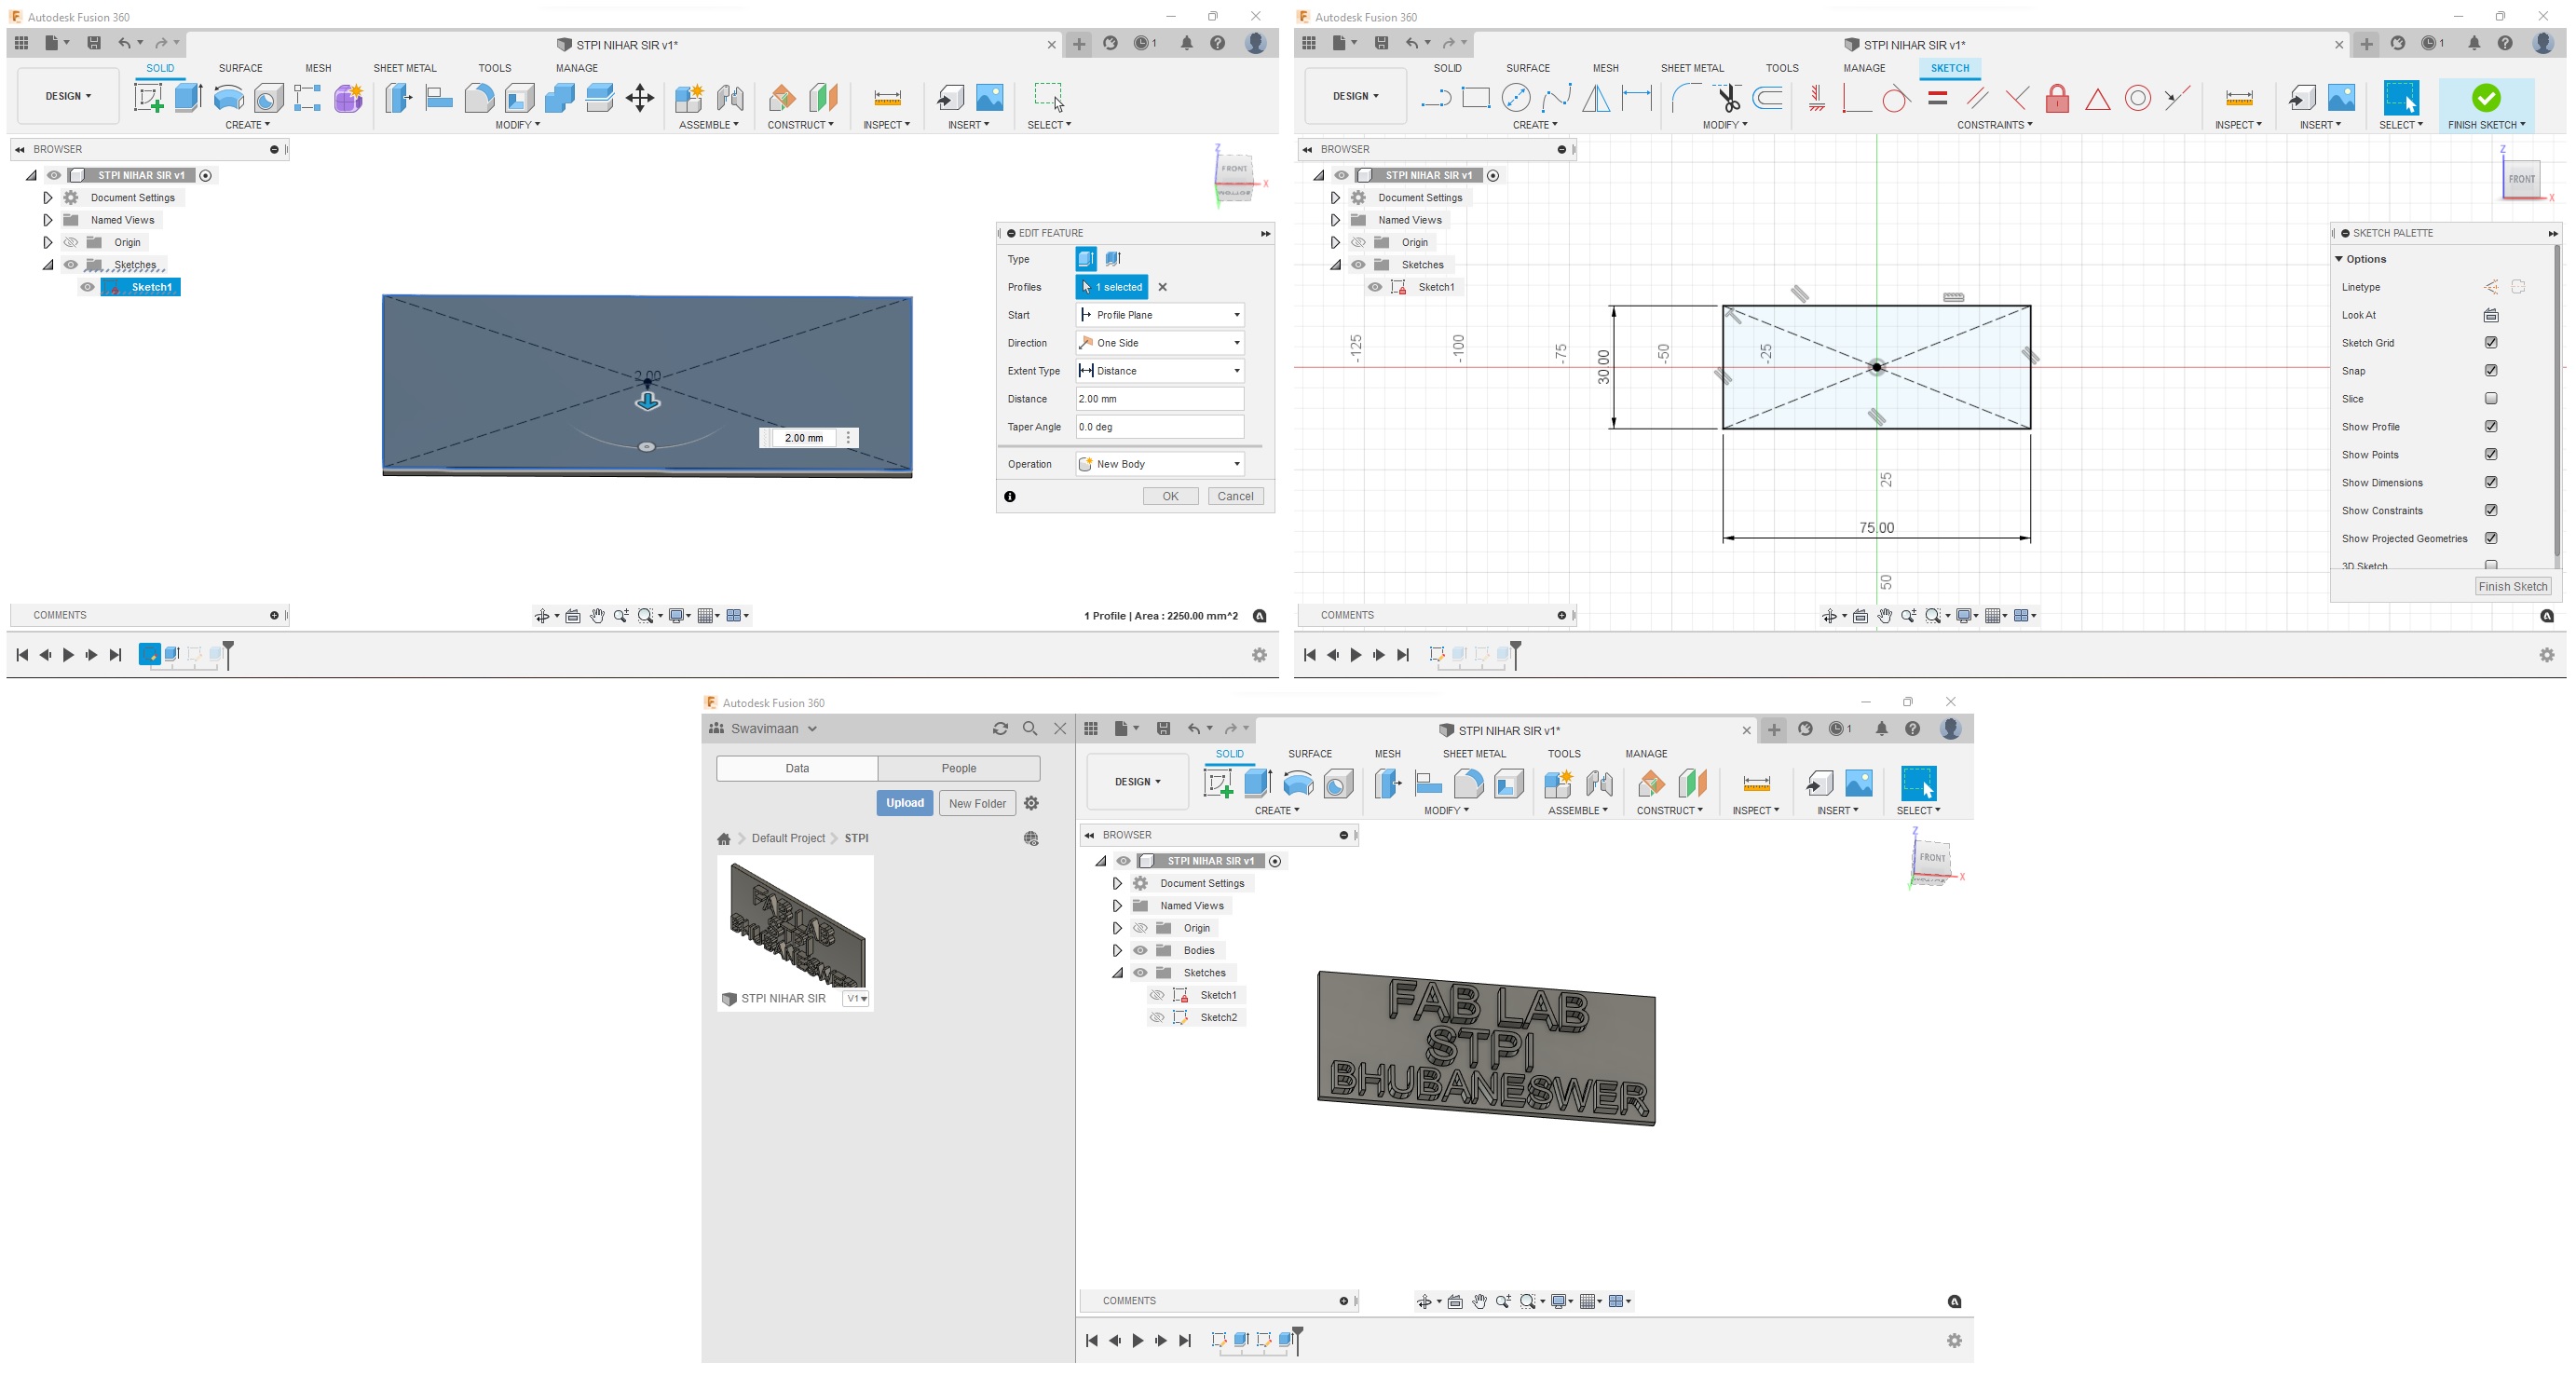
3D Design for Mold Using Fusion360 |
||||
I learnt How to Create a One-Part Mold in Fusion 360 tutorial to help me designing my mold.
|
||||
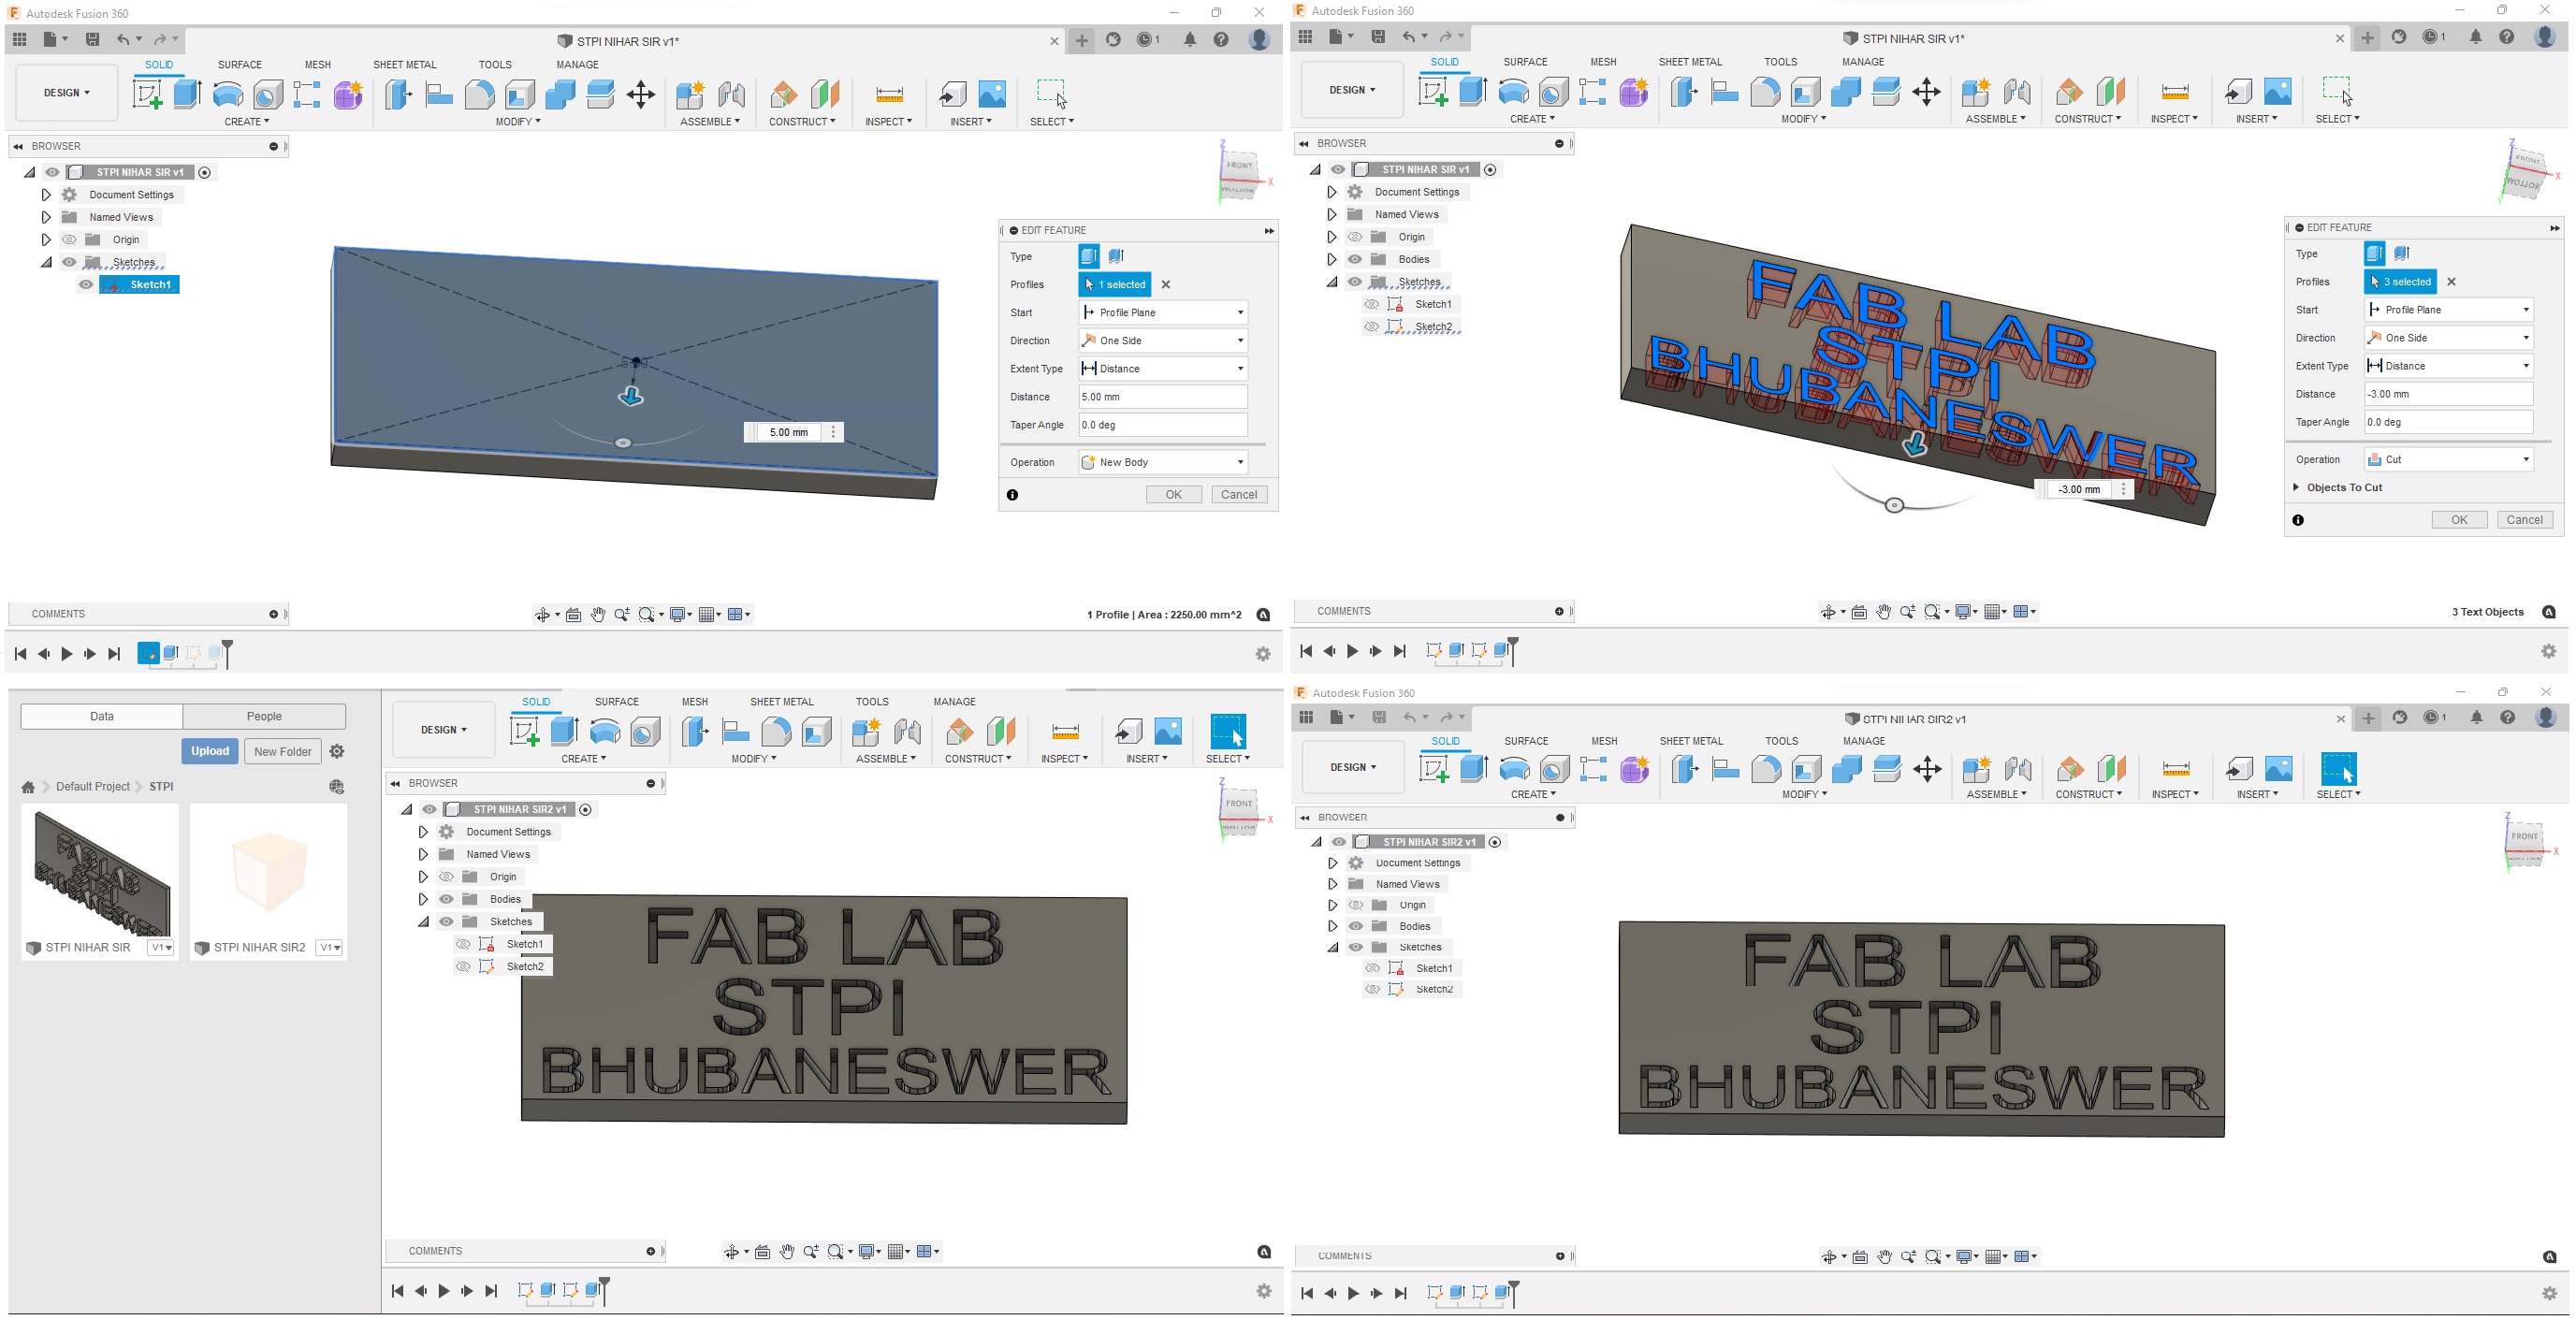
INTRUDE |
||||
 |
||||
 |
||||
EXTRUDE |
||||
 |
||||
|
||||
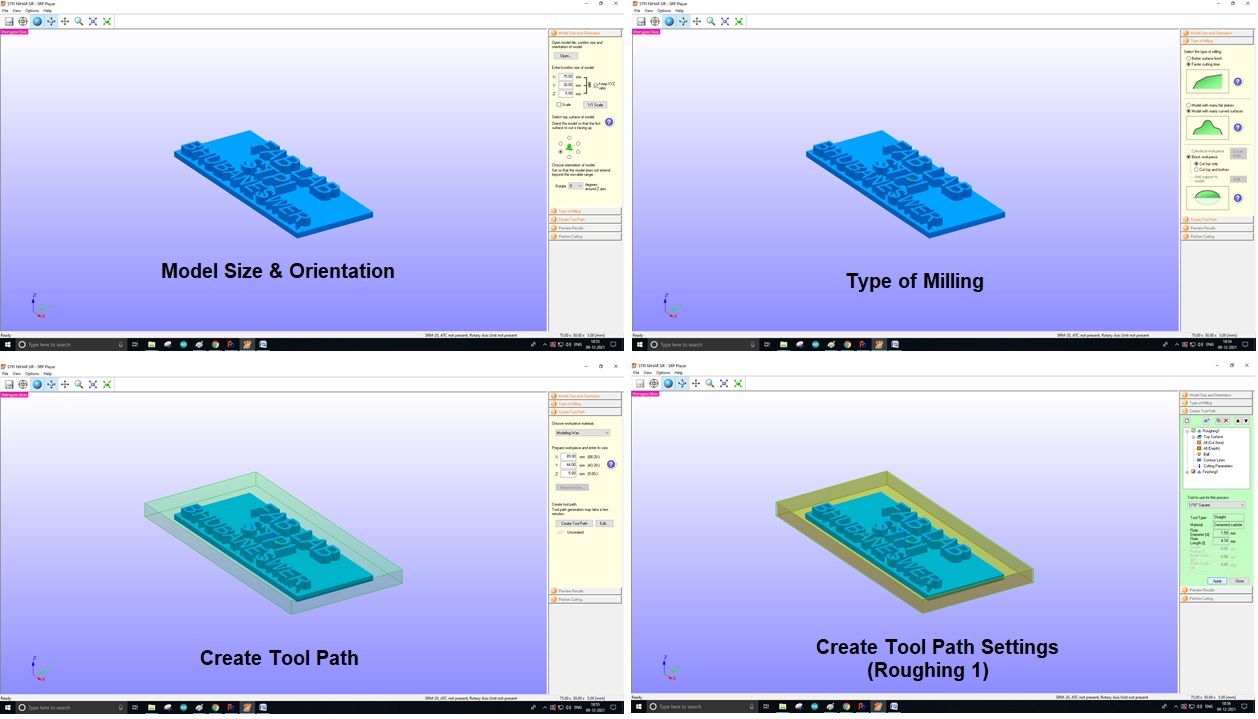
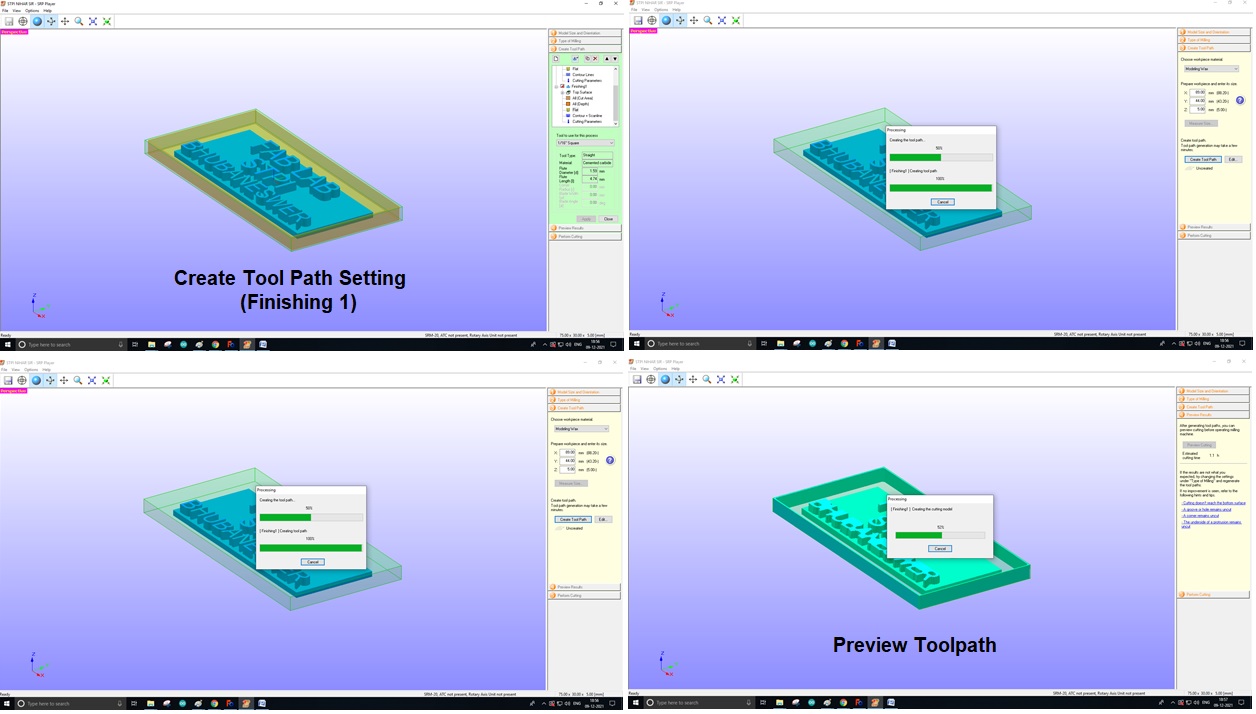
Steps for Milling the Mold with Roland SRM-20 by using SRP Player |
||||
A powerful tool path engine optimizes path quality and tool approach, ensuring quality finishes and faster path calculation times. Roland’s SRP Player software which enhances SRM-20 functionality and streamlines workflow, allowing users to get the most out their state-of-the-art mills. Roland SRP Player supports most popular CAD file formats, including STL, DXF, Rhino, 3D Model and IGES. New and existing monoFab SRM-20 owners can download SRP Player with a few clicks of the mouse through Roland’s included OnSupport software. SRP Player also makes multiple tool path operations and progressive path simulations available to SRM-20 users through a built-in preview feature. Additionally, SRP Player software also incorporates unique editing functions that let users explore new milling capabilities as their skills progress. I experimented for milling by using “SPR Player” software. I saved models to “.stl” file format for opening them in the SRP Player to make milling routes. |
||||
|
||||
 |
||||
 |
||||
 |
||||
Output of the model after milling |
||||
Since, I have designed both Intrude and Extrude, I first tried with the cutting for Extrude of the object in Modella. The outcome of the object after milling is shown below: |
||||
 |
||||
The Process for final Molding & Casting |
||||
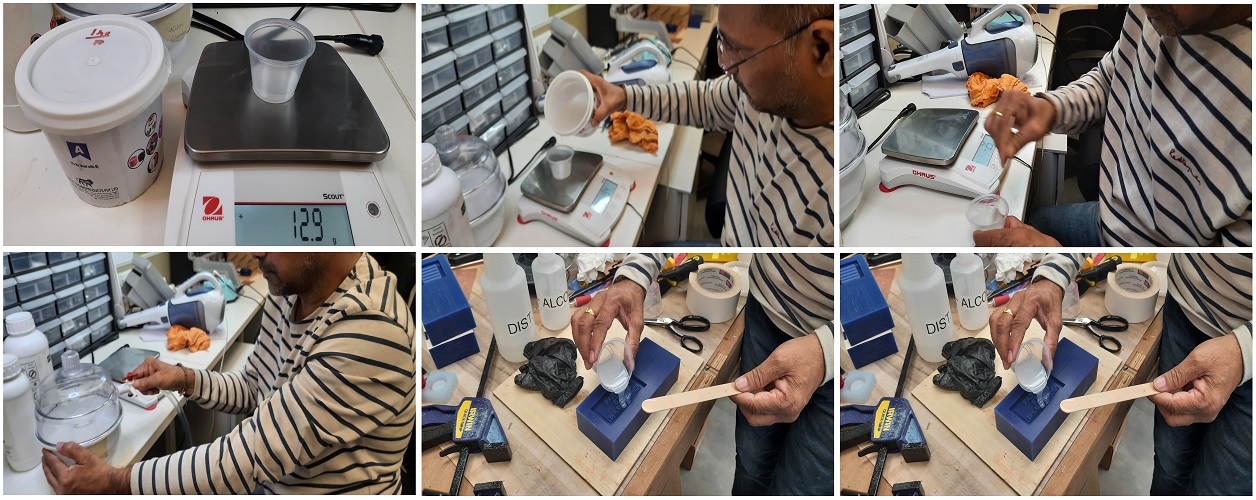
Step 1 : Making the mixture The volume of the silicone to be used is measured with approximate volume of the total moulds and calculating accordingly. |
||||
Since, the sillicons were expired in the lab, we have bought the SILCOZEST Liquid Silicone Rubber 140.Its a two-part silicone rubber that vulcanizes at room temperature. |
||||
Data Sheet:: |
||||
This is the Food grade Silicone Rubber that can be used for Making the chocolate mould. Liquid Chocolate datasheet Specifications: Color/Appearance: Clear to slightly opaque dark brown liquidAroma/Flavor: Characteristic of cocoa with a pleasant taste and aroma Ingredients: Water, Ethyl Alcohol, Cocoa Allergens: None Shelf Life: 6 months Country of Origin: USA Storage: Store tightly sealed in a cool dry place protected from direct heat and light. Packaging: Available in 8 oz., 16 oz., 32 oz., and 64 oz., twin neck plastic bottles designed to eliminate additional measuring by providing a Suggested Applications & Usage: Can be used for a variety of applications including bakery, food & beverage, ice cream, etc.: Start evaluation at 0.50% and adjust accordingly |
||||
 |
||||
The Process for Casting through Silicon Mould |
||||
Preparation of Silicon Rubber liquid for Molding: |
||||
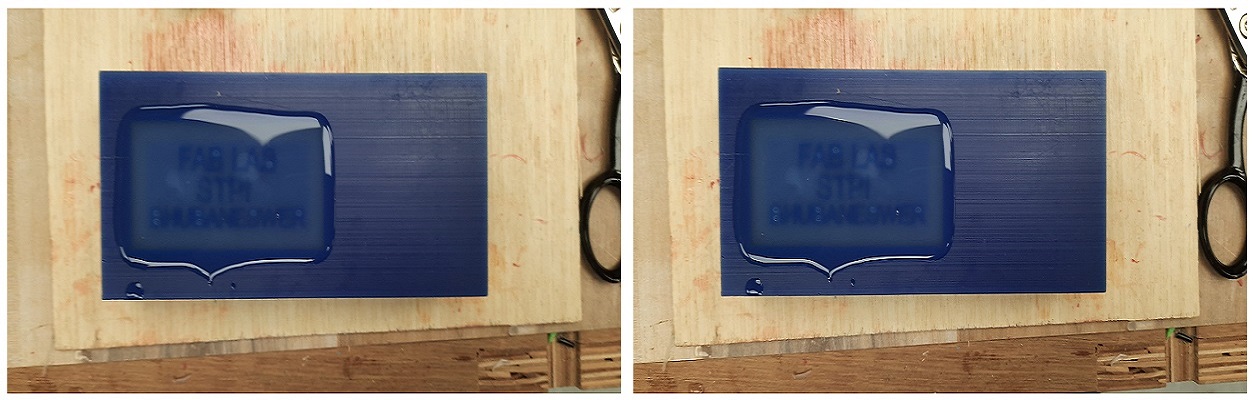
After the completion of the milling of the design and for molding I used the Liquid silicone Rubber which is having two parts, namely Part A and Part B based on the User Instruction Mixing ratio of 1:1 as per the required weight. For making the solution with the mixture of 12.5 gm of each solutions in a small plastic bowl and stirred for 10-15 minutes, so that both the both the solutions can mix properly for making the product into a good shape. I placed the bowl in the Mercury Vacuum for around 15-20 minutes so that all the bubbles will be dissolved and to make the solutions ready for molding. After removing the air bubbles in the mercury vacuum the liquid is poured to the milled work piece and left for 12 hours and the final product is ready. |
||||
 |
||||
|
||||
 |
||||
Final Output. |
||||
 |
||||
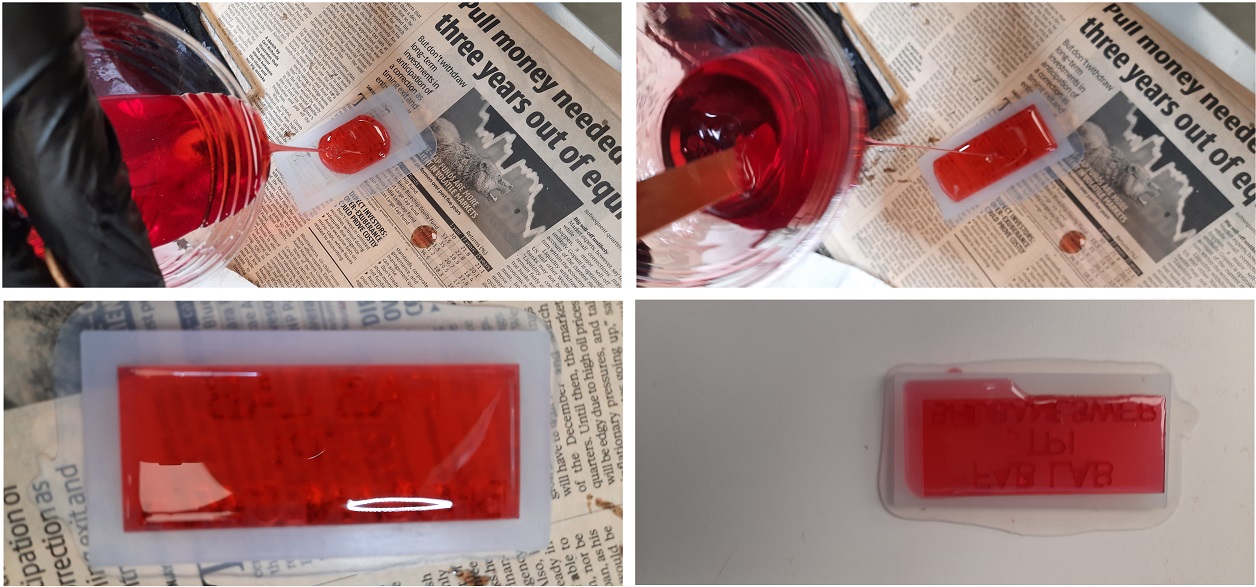
Casting: |
||||
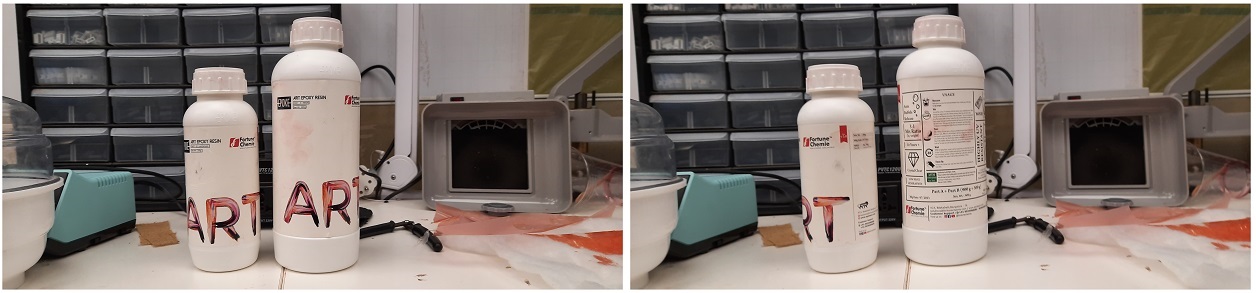
In the earlier phases, I have 3D designed made with a Wax Blocks, Milled the design on the Wax block (Positive Mould) then poured the Silicon to make the Positive Mould and would be Casting using various materials like HydroStone, Epoxy Resin, Paraffin Wax etc. Here I used Epoxy resin which is available in my lab. As I have already dealt with Epoxy Resin in my earlier mold making, I decided to do the Casting with it. I used Epoxy Resin which is of Part-A & Part-B for giving the final shape to the design. Then, I took the Part A & Part B Epoxy Resin with a proportion of 3:1 ratio and poured into a plastic glass.
Next Day, I decided to Cast it with Epoxy Resin. This time I took caution to take more material. The Mixing Proportion for Epoxy Resin is 3:1 |
||||
Stirring and Bubbles |
||||
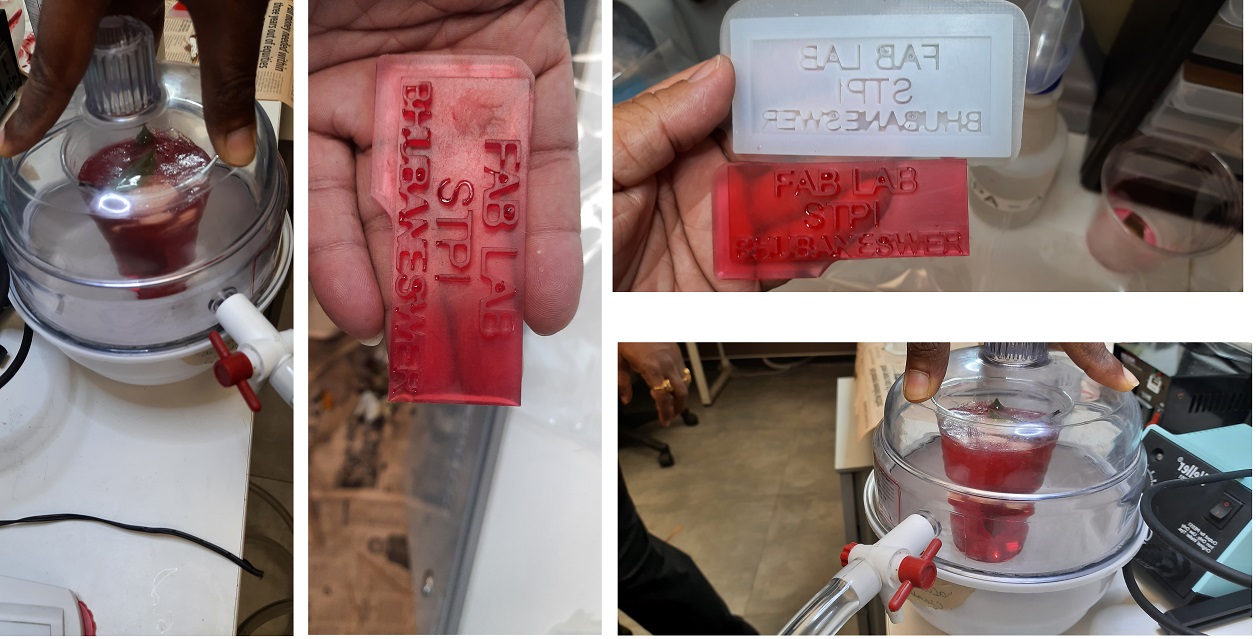
After We prepared the silicon (Art Epoxy Resin Part-A & B) mix with a ratio of 3:1 (Part A (3) : Part B (1) with adding the red color for a decent look. I mixed the 2-part (Part A & B) (epoxy resin A B resin image) materials with a ratio of 3:1 and mixed properly, if these solutions will not mix the 2 parts, they will not work as expected. After mixing of the silicon mixture, we stirred it properly so that, all the solutions can mixes properly. The problem is, that stirring introduces air-bubbles. This creates challenges, especially if the pot time is in the range of 3 min. Mix, stir, pour & de-gas. Accordingly, we used vacuum chamber for melting of the bubbles generated during stirring of the mixtures. |
||||
The Safety Data |
||||
The safety data for the molding and casting material is basically the same-
After that we put the mixture into a plastic glass and put into the We put a small amount of silicon mixture |
||||
 |
||||
After that we put the mixture into a plastic glass and put into the oven, so that the bubbles get evaporated. |
||||
 |
||||
The solution was kept for curing for 24 hours. And after it, the mold is ready. |
||||
 |
||||
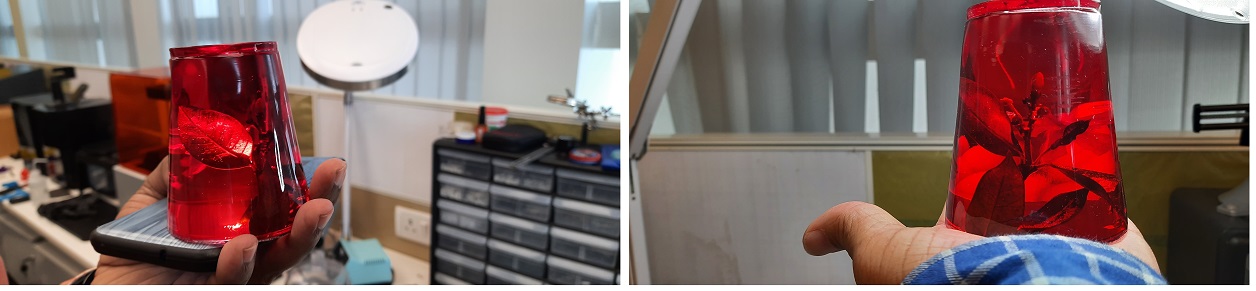
I also experimented for making a gift kind of thing with the resin. I Put a small flower with leaves into a plastic cup and pured the remaining resins. Here it looks like this. |
||||
 |
||||
Download Files |
||||